How to Quickly Import Product Images to Your Online Store
%20(1).png)
The Ultimate Guide to Marketing for Wholesalers
The Essential Guide to Virtual Trade Shows for Wholesalers
.png)
When setting up an online store, importing images has historically been one of the most painful activities, especially for wholesalers with massive catalogs. That’s why we built a system that makes it quick to keep your entire catalog updated.
With a bit of spreadsheet magic and the power of the cloud, you’ll save yourself from miserable hours of painstakingly uploading images and pointing them to the right product. Just a few edits to your product list spreadsheet are required, and you’re good to go.
While the guide is created for B2B Wave for running your B2B eCommerce portal, similar steps can be followed for other eCommerce solutions.
Steps for bulk uploading product images
Bulk uploading is the process of uploading multiple images at once. It’s a process that you can (and should) automate for the most part.
Bulk importing images is a straightforward process that’s done in four steps:
- Name your images
- Upload your product images to an image management solution (Cloudinary).
- Prepare your spreadsheet for compatibility with B2B Wave’s “Import” tool.
- Import your spreadsheet (new or modified) to your B2B Wave admin panel.
Name your images accordingly
Let’s say you have three products whose SKUs are 11010, 11020, and 11030, respectively. Rename 11010’s product image to 11010.jpg, same for 11020.jpg and 11030.jpg.
It’s important to note that our images are in .jpg format in the example above — but the B2B Wave platform also accepts .png images. Make sure your product photos are in either of these formats (pick only one extension to stick to).
Create an account to a cloud-based image management solution like Cloudinary
If you aren’t currently using any cloud service to store your product images, it’s time to start. We are going to use Cloudinary in this article because of its generous free plan.
Create a free account on Cloudinary, log in, and visit your Media Library (top left). Create a new folder (we’re going with the name product-images), and upload your product images by dragging and dropping them in there.
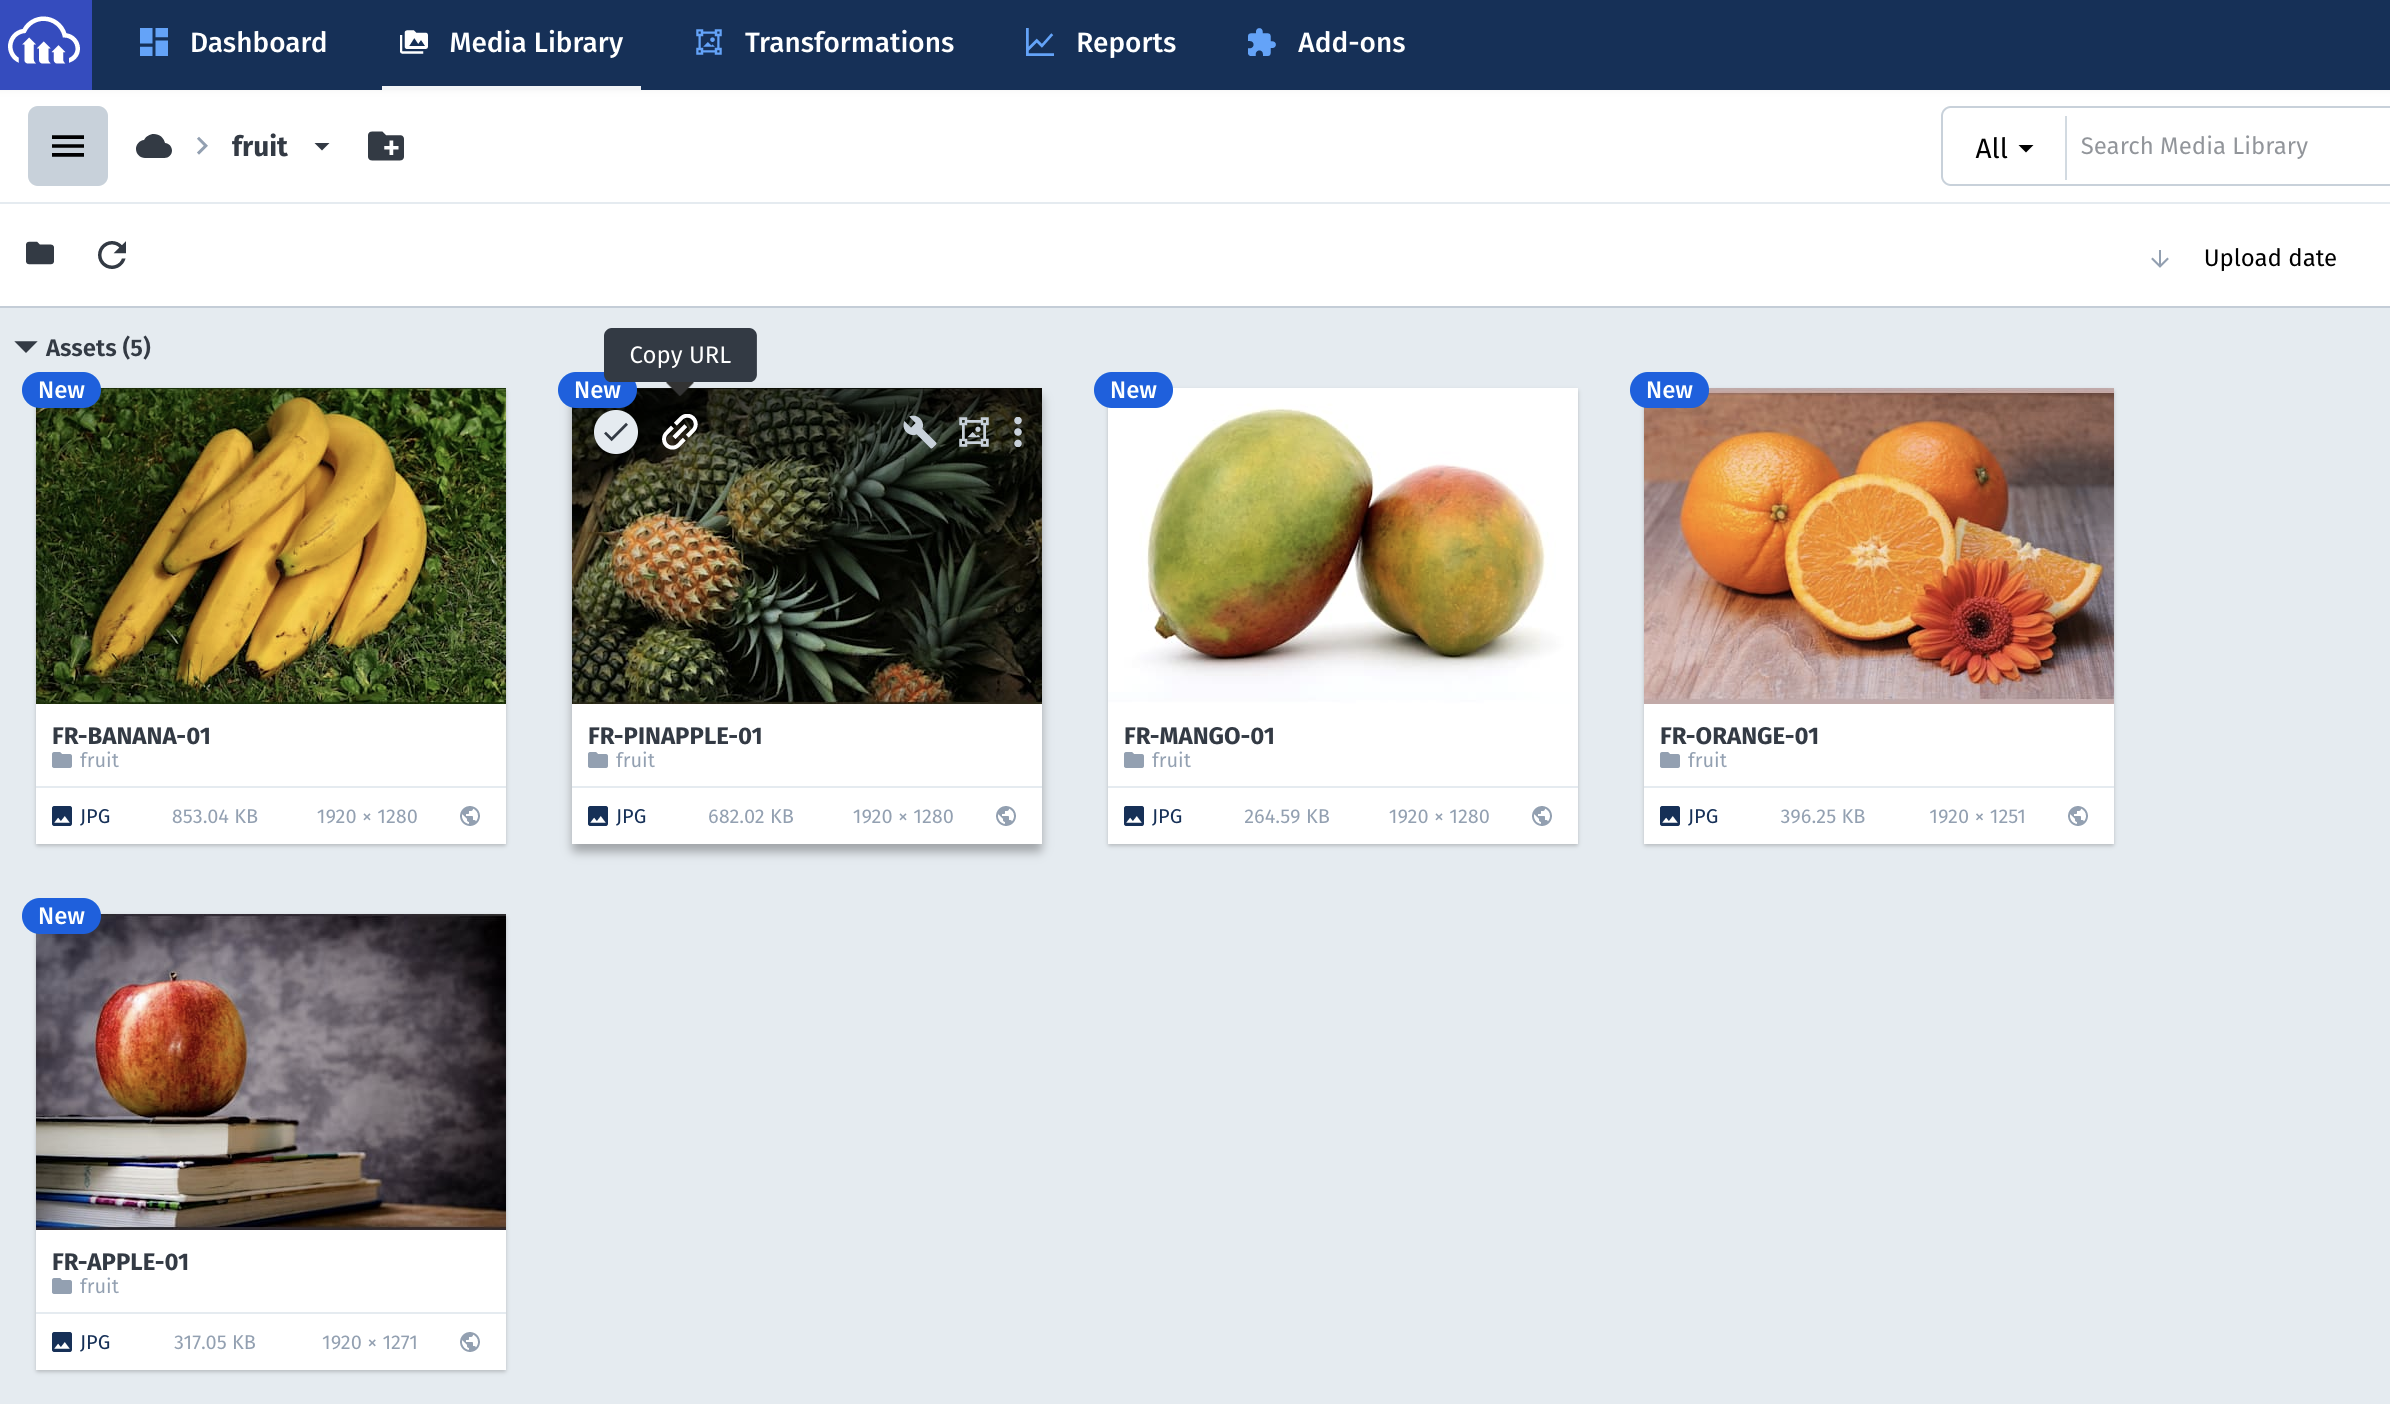
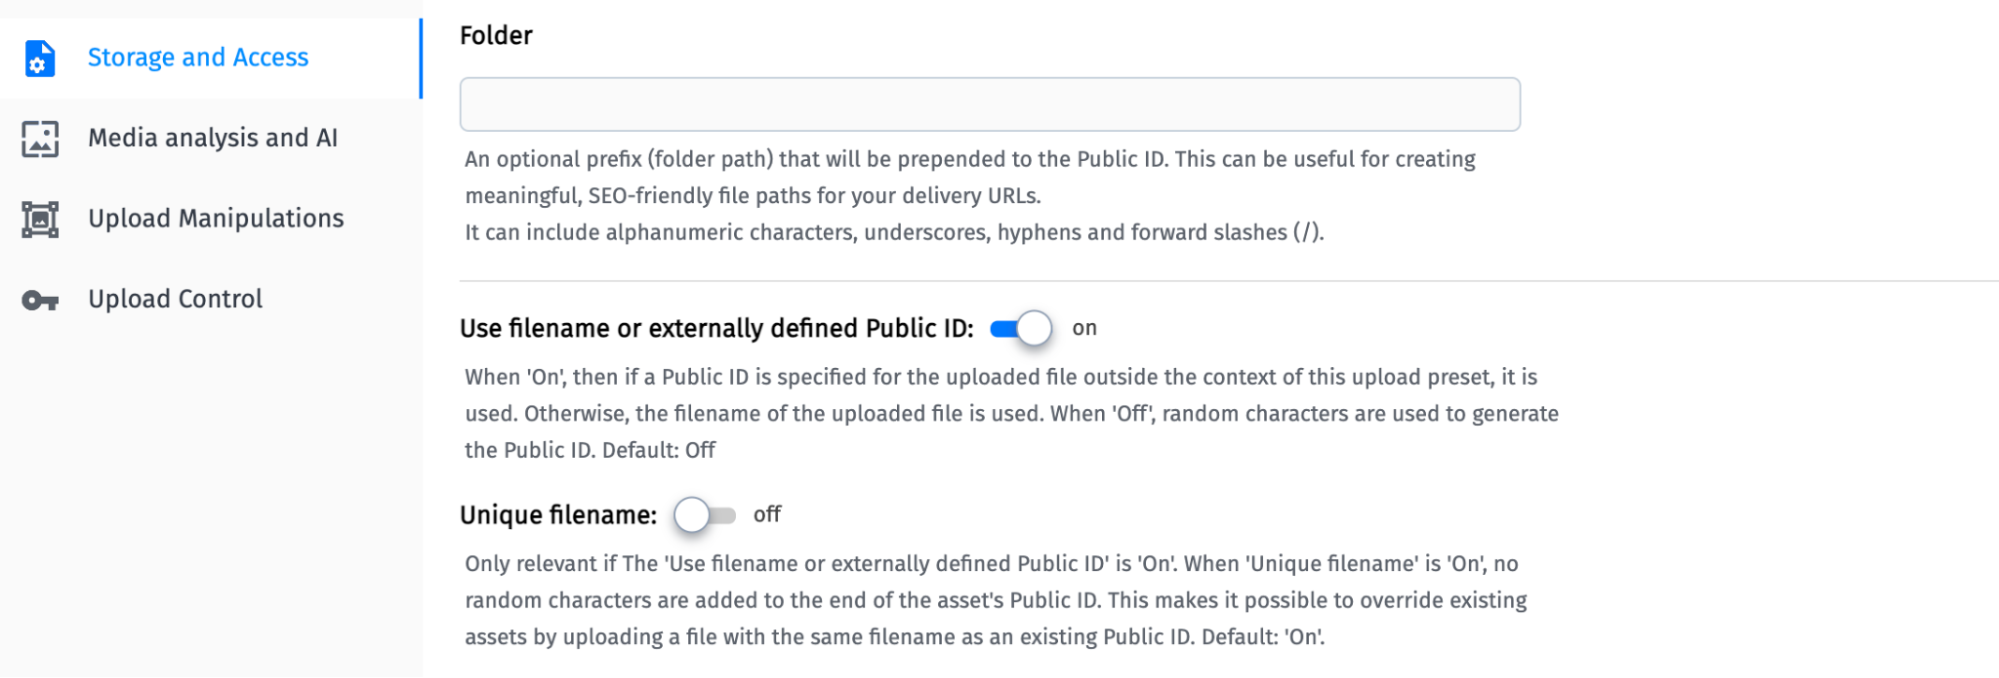
Important: If Cloudinary adds random letters to your image’s names, visit the settings page (top right). Go to the Upload tab, and turn off “Unique filename” in the ml_default settings (in the Upload Presets section).
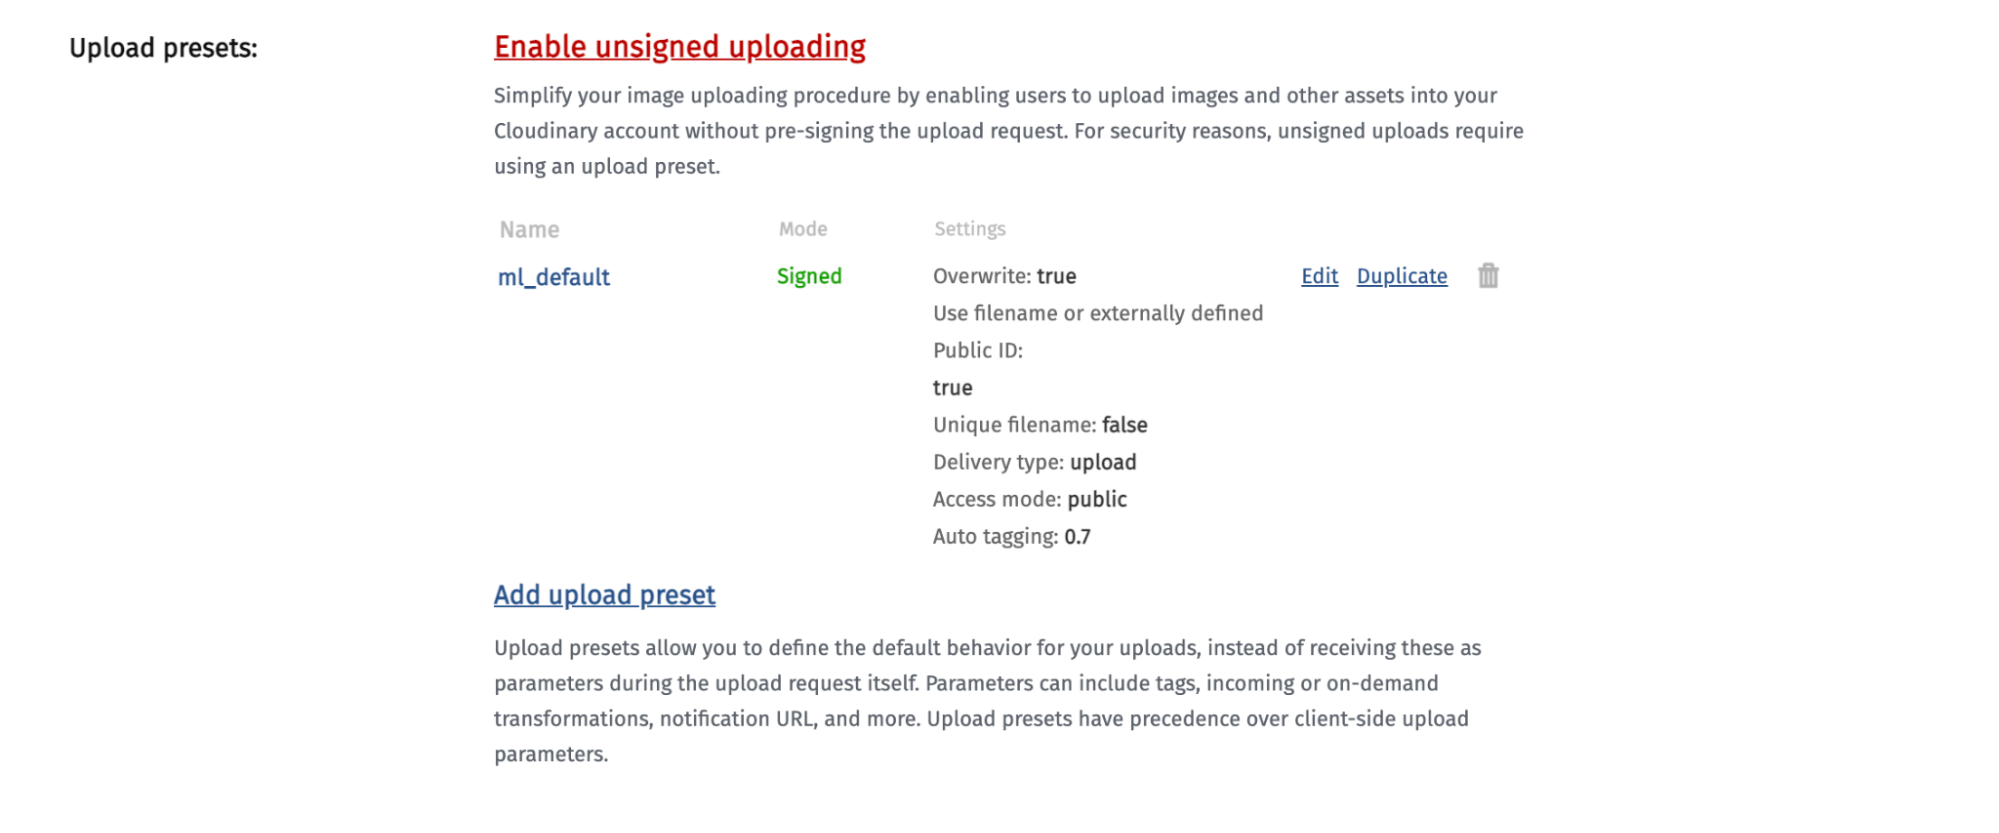
Click Edit, and you’ll land on a tab that says Storage and Access. Toggle “Unique filename” so that it's off.
Now right-click your image and select “Copy URL”. It should look like this: https://res.cloudinary.com/**********/image/upload/v***********/product-images/10110.jpg
The two groups of asterisks represent your cloud and account IDs, respectively. “product-image” is the name of the folder you created.
Preparing your spreadsheet for import
Go back to your B2B Wave dashboard, click on the Export tab under Products, and export your product list.
Easy method
For each product image in Cloudinary, copy the image URL (right-click and Copy URL) and paste the URL to the Excel file in the image_url column (create it if it doesn’t exist). Do this for every product that you want to change the main image of.
Advanced method
Look for the image_url column in the exported spreadsheet (create it if it doesn’t exist), and give it a dynamic value with a concatenation of:
- Your Cloudinary folder path — in our example URL: https://res.cloudinary.com/**********/image/upload/v***********/product-images/
- The value from the product_sku column
- The file extension of your images — e.g., .jpg
This lets you automatically update all of your product images at once. Suppose we start from row 2: here’s how the formula in the image_url cell should look:
="https://res.cloudinary.com/**********/image/upload/v***********/product-images/" & A2 & ".jpg"

Extend the function to your entire product list by selecting its cell and dragging the bottom right corner through the column. Then, save the spreadsheet.
Importing Additional Product Images (optional)
Importing additional images to each of your product’s galleries follows a similar process as the method above.
First, ensure you have a standard naming scheme for your images. For example, attach “_A” to your product’s main image’s filename, then “_B,” “_C,” and so on to the extra ones.
Next, create columns named gallery_image_url1, gallery_image_url2, gallery_image_url3, etc. (up to however many images you’d like to showcase).
Afterward, paste the formula we used for the main image into the gallery_image_url1, gallery_image_url2, etc., columns. Edit the last part of the formula to match your product naming scheme (in bold below). For your product on row 2, gallery_image_url1 should look like this:
=“https://res.cloudinary.com/**********/image/upload/v***********/product-images/” & A2 & “_B.jpg”

The same goes for gallery_image_url2, where you’ll replace “_B.jpg” with “_C.jpg” Repeat the process for each relevant column, then extend the formula to the rest of your spreadsheet.

Important: It’s common to have a varying number of images for each of your products. Some will have one or two—others will have four or more. You’ll have to delete links you don’t use from the cells manually throughout your spreadsheet.
The next (and last) step is to import the spreadsheet we just modified. Go to your B2B Wave dashboard, select the Import tab under Products, then hit the “Browse…” button. Select your spreadsheet, then hit Import.
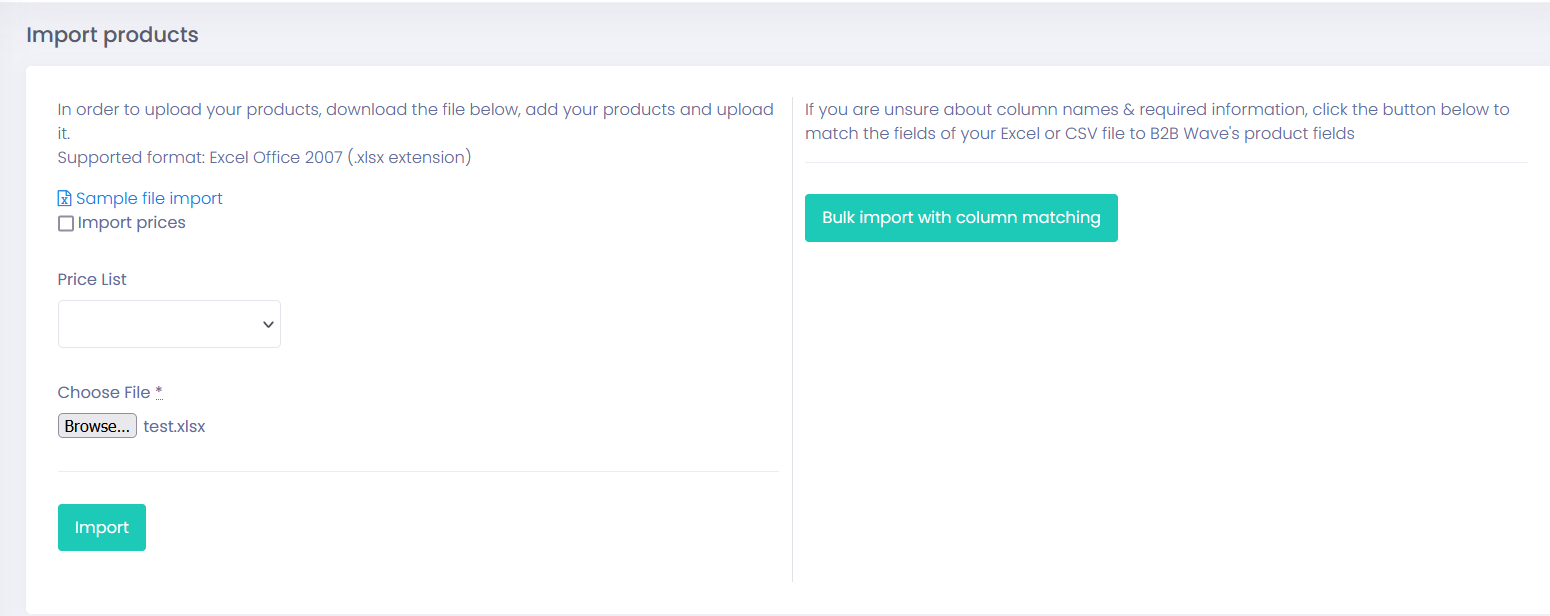
Note: You don’t need the Bulk import with column matching function since your product list comes from B2B Wave.
But if you’re using a custom spreadsheet, make sure your columns match the sample sheet. Our software lets you pick which columns do what—so as long as you stay consistent, you shouldn’t have any issues.
You’ll see the “Imports log” window that’ll show you the import’s progress. The log will tell you how many products were updated (should be all of them).
If your products already have an image, importing will override it. Additional image—if present—will stay there.
Congratulations!
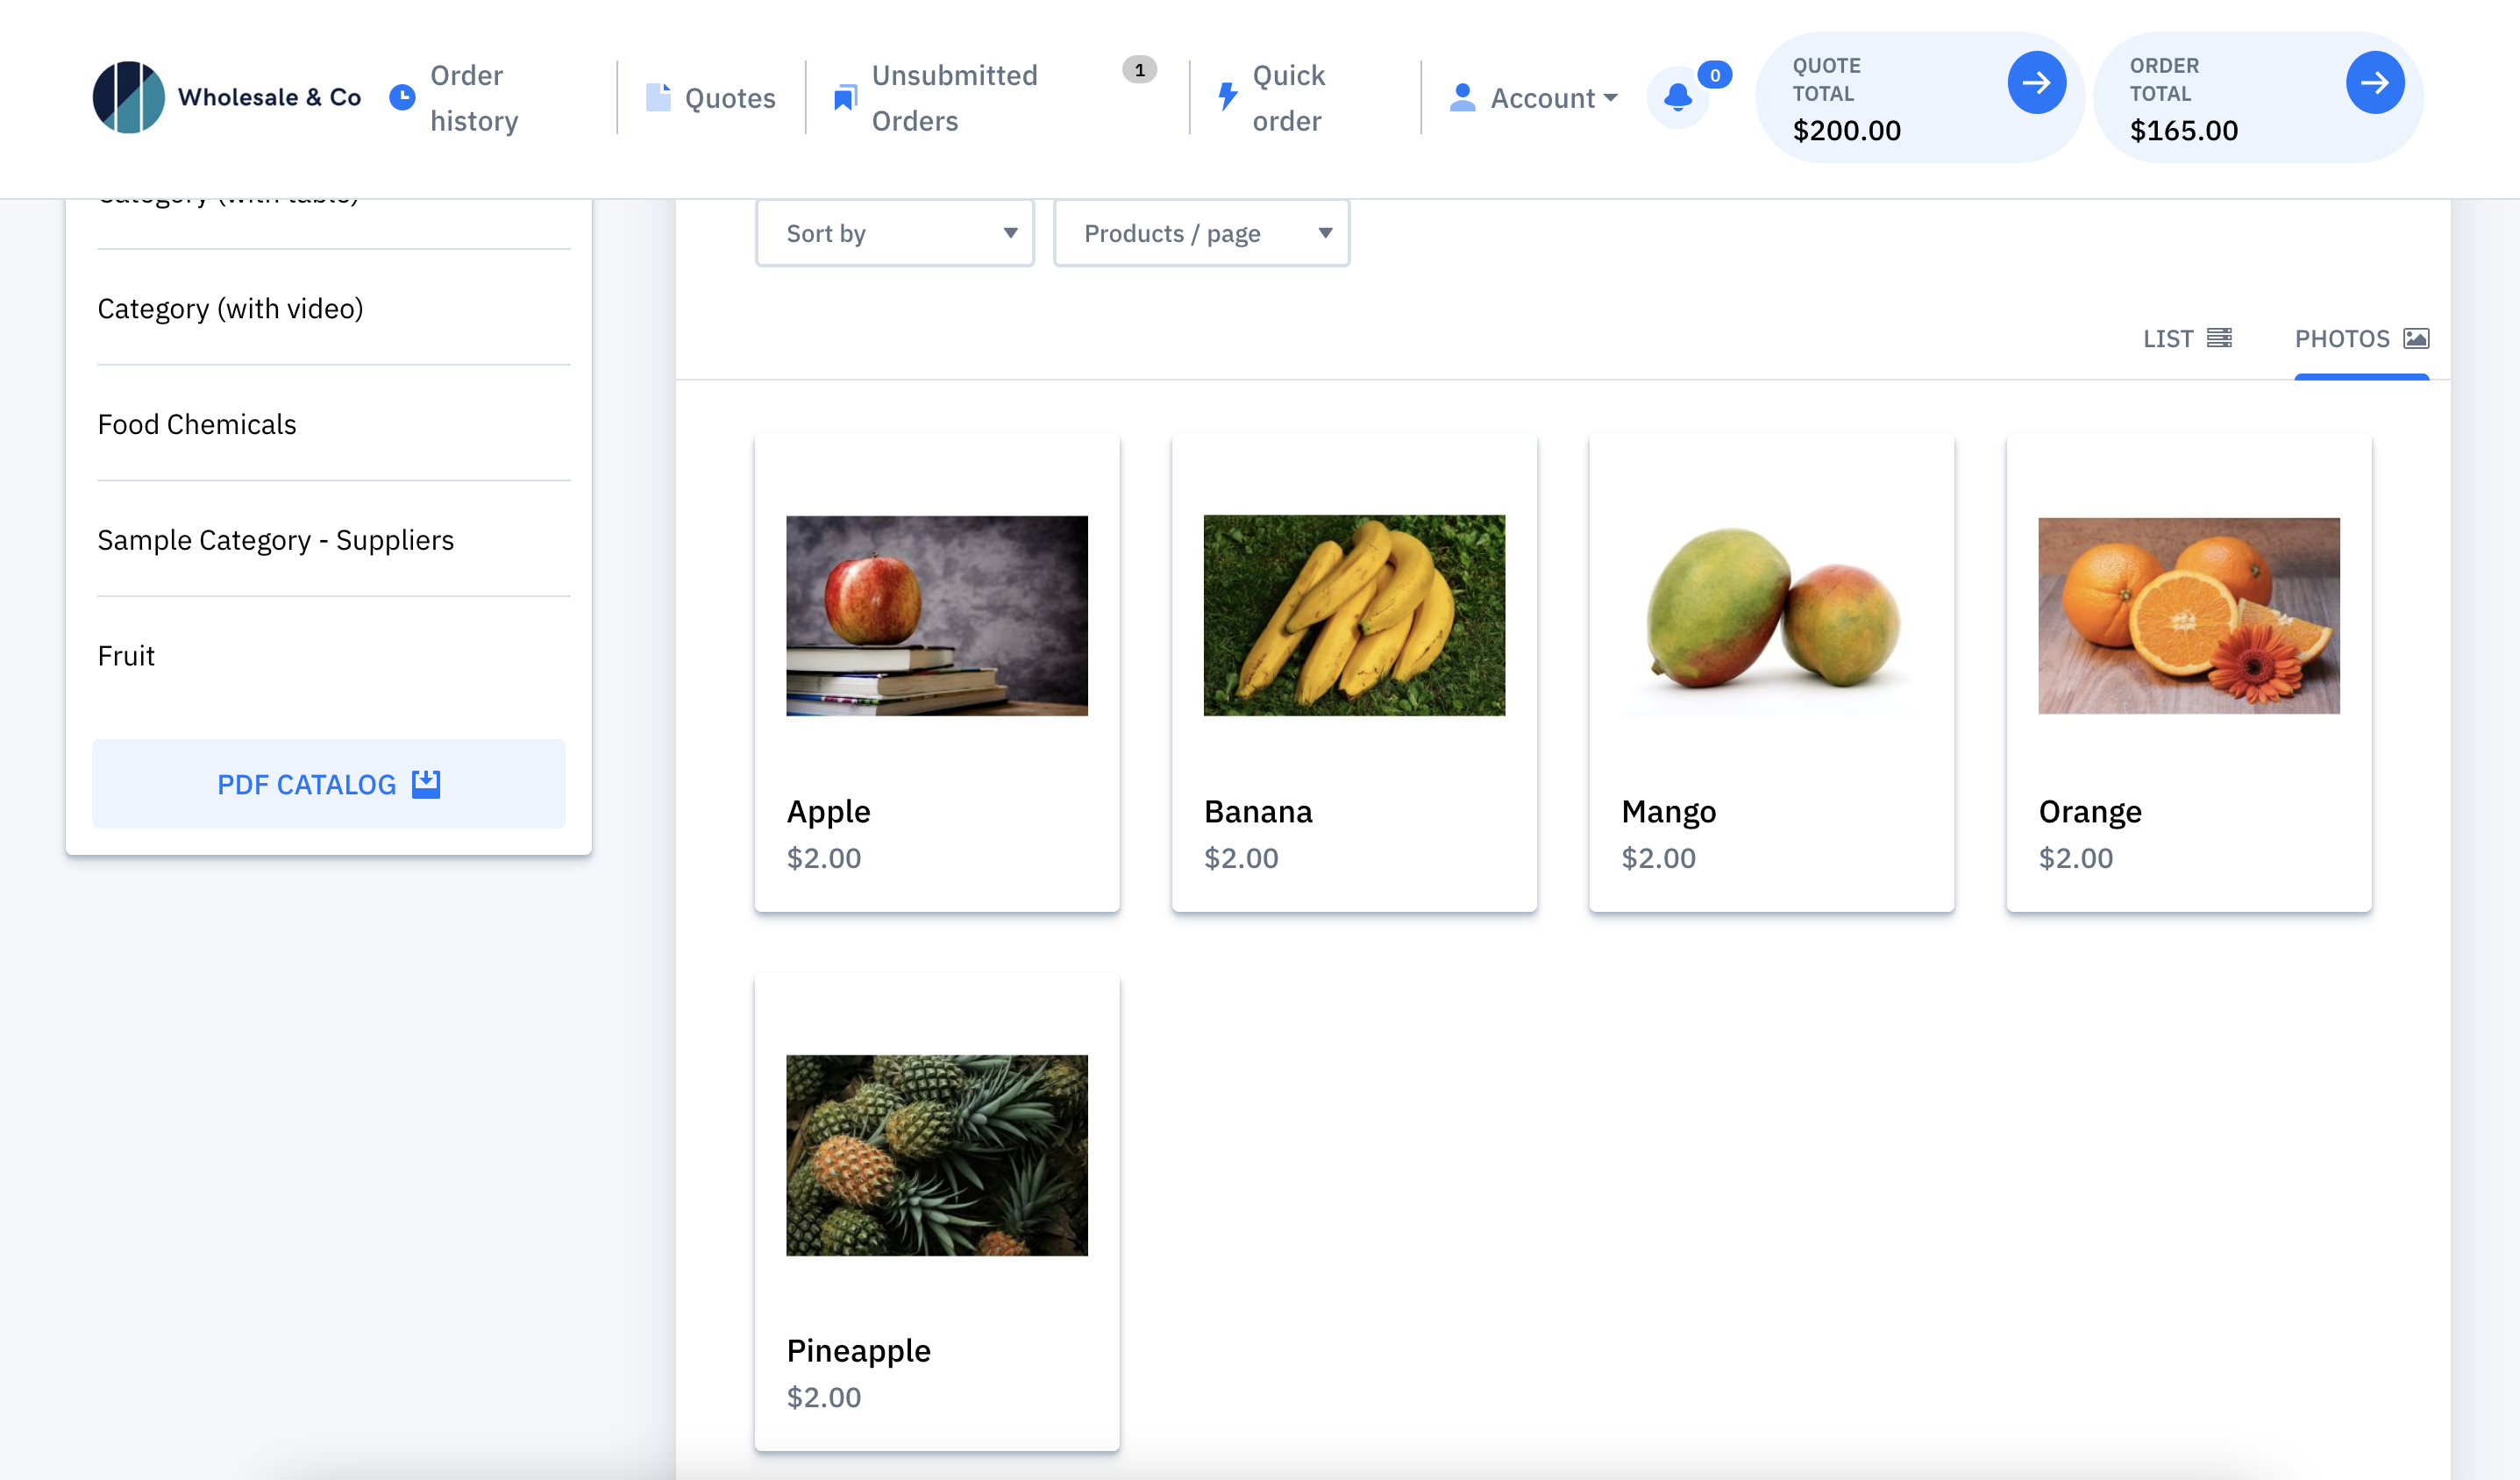
You’ve updated your entire product catalog in just a few quick actions. We recommend uploading product images this way because of this method’s scalability. And every time you want to add more products (images included) to your catalog, you can just export your list.
Important: We recommend attempting to use this guide’s method with three-four products at first. If everything goes smoothly, you can repeat the process for your entire catalog. It won’t take more than five minutes once you’ve learned the process, we promise!
Spend time and effort more wisely with B2B Wave
When you have a lot of products in your catalog, uploading all of the images at once can feel daunting —but with B2B Wave, it’s effortless.
You upload your images to a cloud service, then use their URLs to populate your spreadsheet’s image_url column. Since the cloud service has a predictable URL scheme, you can use this method for catalogs of any size. No matter if you have thousands of products or tens of products, it’ll take you minutes, not hours, to update your list.
Do you want to save time on keeping your storefront updated? Request a demo today, and you’ll be able to spend more time growing your wholesale business and less on inventory management.


The Ultimate Guide to Marketing for Wholesalers
%20(1).png)

The Essential Guide to Virtual Trade Shows for Wholesalers
%20(1).png)


